
Have you ever looked at your car and found out why your headlights were dull, cloudy or simply dirty? You’re not alone. Foggy headlights are incredibly common, especially in older vehicles. However, although it is a widespread problem, it may severely impact your visibility during the night – and the appearance of your car as well.
Read More – What Size of Hail Will Damage Your Car?
Fortunately, you do not have to hurry to an auto detailer and spend a lot of money. You can make those headlights almost new with the proper tools, a little time and some honest elbow grease.
Common Reason behind the foggy headlight
1) Oxidation from UV sunlight (most common)
Over time, UV rays break down the clear protective layer on polycarbonate headlight lenses. That surface damage turns the lens cloudy/yellow and makes the light look dimmer.
2) Road grime + tiny scratches
Dust, sand, salt, and car-wash brushes create micro-scratches. Those scratches scatter light and make the lens look hazy, especially at night.
3) Moisture/condensation inside the headlight housing
If the headlight seal is worn or cracked, water vapor gets in and condenses, creating fogging from the inside (often comes and goes with temperature changes).
4) Heat damage from bulbs or poor ventilation
Headlights get hot. Over time, heat can warp plastics slightly or stress the lens coating, leading to a milky appearance.
5) Harsh chemicals or wrong cleaning products
Strong cleaners (or abrasive compounds) can strip the lens’s protective coating, speeding up fogginess.
Clean Cloudy Headlights
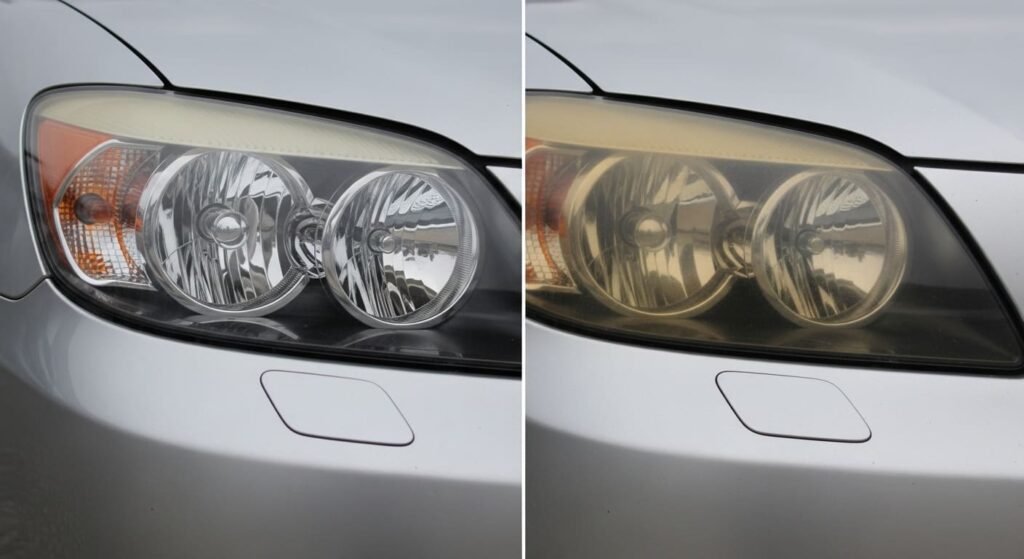
Why do your headlights become cloudy, to begin with? It happens mainly because of oxidation. Polycarbonate plastic is commonly used to make modern headlight covers, since it is strong but can get damaged by UV rays. The sun gradually wears away the outer layer which causes the paint to look hazy or yellowish.
Road grime, dirt, rain and even salty air can cause the process to happen more rapidly. Looks aside, clean cloudy headlights is not just about aesthetics — cloudy headlights make it harder to see at night, which can be dangerous. That’s the reason why cleaning cloudy headlights goes beyond looks. It is also about making sure the home is safe.
Now, we can discuss how to clean foggy headlights at home. You can do it with simple tools, but the right product helps a lot. Some popular headlight cleaners that people trust are mentioned below:
- 3M Headlight Restoration Kit – Known for reliable, pro-level results
- Meguiar’s PlastX Clear Plastic Cleaner – Quick and effective for light fogging
- CERAKOTE Ceramic Headlight Restoration Kit – Offers long-term UV protection
- Sylvania Headlight Restoration Kit – Includes everything, even a UV-block clear coat
- Turtle Wax Headlight Lens Restorer – Budget-friendly and widely available
These products aren’t just marketing gimmicks they’ve been tested by thousands of real drivers. If you’re serious about a clean, clear finish, they’re worth it.
How to Clean Foggy Headlights at Home
Now that you know what causes the problem and what to buy, let’s talk about actually doing the job at home. The good news? It’s easier than it looks. With a few household items and a bit of patience, you can clean foggy headlights at home without leaving your driveway.
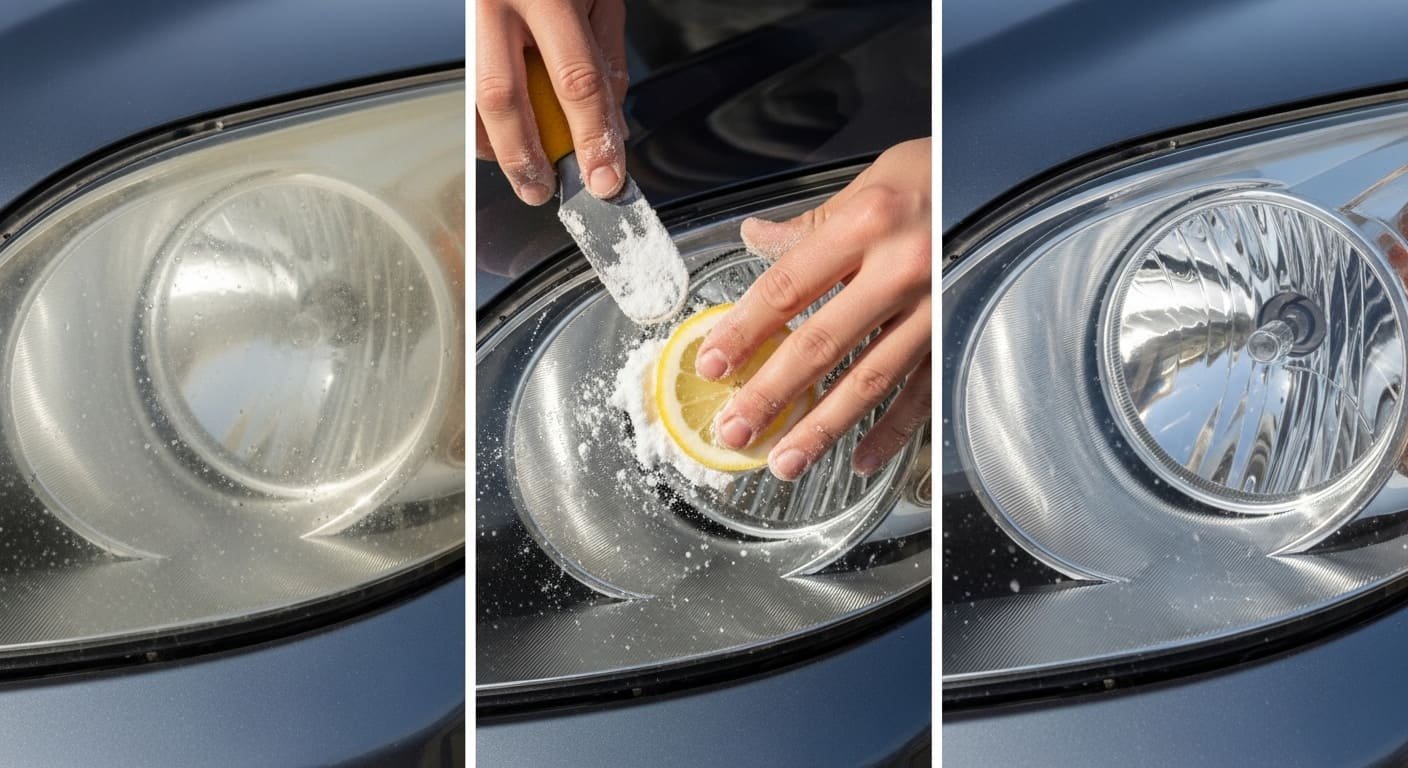
First, give the headlights a wash with car soap or warm soapy water. You want to remove all the loose dirt before starting. Then, grab some toothpaste — yes, plain white toothpaste — and a soft cloth. Rub the paste in small circles over the lens. It works like a mild abrasive, removing the outer foggy layer.
Once you’ve finished scrubbing, rinse the headlight and wipe it dry. Already, you should see a noticeable improvement. For even better results, use a fine polishing compound and finish with a UV-protectant spray. That last step is important it keeps the lens from fogging up again too soon.
Other At-Home Tricks You Can Try
Here are a couple more DIY options that have worked for many drivers:
- Baking Soda & Vinegar Paste – Mix them into a thick paste, apply it to the lens, and gently scrub. It cuts through grime and oxidation well.
- Bug Spray (DEET) – It’s a controversial method. DEET temporarily clears the fog but can damage plastic long-term, so use cautiously if at all.
Most of these methods give temporary results unless sealed. That’s why following up with a UV sealant is crucial. Otherwise, foggy headlights will return in weeks.
Fix Foggy Headlights
There are times when a basic clean doesn’t do the job. If your headlights are very damaged by oxidation or the sun, you will have to do more work. That’s why full restoration kits are needed. They consist of sandpaper and polishing pads and anyone, even a beginner, can use them easily.
Most kits help you by having you sand the lens, use a cleaner or polish and finally seal it. Before you start, cover the area around the headlight to prevent paint damage. Depending on the state of the headlights, it should take about 30–60 minutes to fix foggy headlights, and the results can be impressive.
The key step here is sealing the lens. Without that, you’re just inviting oxidation to come back. Many restoration kits include a UV sealant, but if not, pick one up separately and apply it as a final coat.
What Makes These Kits Worth It?
Here’s why many people prefer restoration kits over DIY pastes:
- Results last much longer — sometimes over a year
- They restore both clarity and brightness
- Professional finish without needing a mechanic
- Most kits come with detailed instructions
- Many include the sealant, so you’re protected from UV right away
If your headlights have deep cloudiness or yellowing, restoration kits are your best bet. They’re affordable and give your car a serious upgrade.
Preventive Tips for Maintaining Clear Headlights
Once your headlights are looking crystal clear, the last thing you want is for them to fog up again in a month. That’s why regular maintenance is just as important as the initial cleaning. Think of it like waxing your car a little care goes a long way.
Start by giving your headlights a quick wipe-down every time you wash your car. Dirt, grime, and road salt can eat away at your lenses if left unchecked. After cleaning, apply a UV-blocking sealant or even a ceramic coating to protect against sun damage.
And whenever possible, park in the shade. Sunlight is the biggest enemy of plastic lenses. Even using a car cover helps slow down the wear and tear over time.
Quick Maintenance Checklist
- Clean headlights every 1–2 weeks with water and mild soap
- Apply UV protectant spray every few months
- Avoid harsh cleaners like ammonia or alcohol-based glass cleaners
- Check for moisture inside the headlight casing
- Park in shaded areas when possible
Keeping up with this simple routine will keep your headlights clearer for longer — and you won’t need to keep redoing the whole cleaning process.
Conclusion
Foggy headlights are not merely an eyesore. They influence your safety, visibility, and the general condition of your car. However, the positive side is that they are not difficult to fix. You can also repair fogged headlights and have your headlights appear brand new with basic supplies or a good restoration kit and you never have to leave your home.
Begin with cleaning procedures such as toothpaste or baking soda in mild instances. When that is not effective, get a complete restoration package and have your time. Apply a good UV sealant and you are good to go in months. And be sure to do some light maintenance to keep those results going.
Your vehicle will be more presentable, your night driving will be safer and you will feel good knowing that you did it yourself.